- Why the Baja Divide is hard on tyres
- Why many finishers are moving away from true “plus” tyres
- The setup emerging among finishers
- Tubeless: essential, but configured differently
- The real key tool: plugs
- Front insert: a recent trend
- The emergency tube (when it really matters)
- The real enemy: sidewall cuts
- The unwritten rule of the Baja Divide
- In summary: the Baja Divide formula setup
- Repair kit checklist for the Baja Divide
- FAQ – Baja Divide tyre setup and puncture management
Baja Divide tyre setup and puncture management: what finishers actually use
In events or crossings such as the Baja Divide, puncture management with plus or wide-volume tyres is completely different from European gravel riding or typical MTB day rides.
Out there, the real question is not whether you puncture — but how quickly you can keep moving in a remote environment.
If you are evaluating which type of bike platform truly works for this route, our main Baja Divide guide explains how geometry, load management and bike design influence long-term reliability.
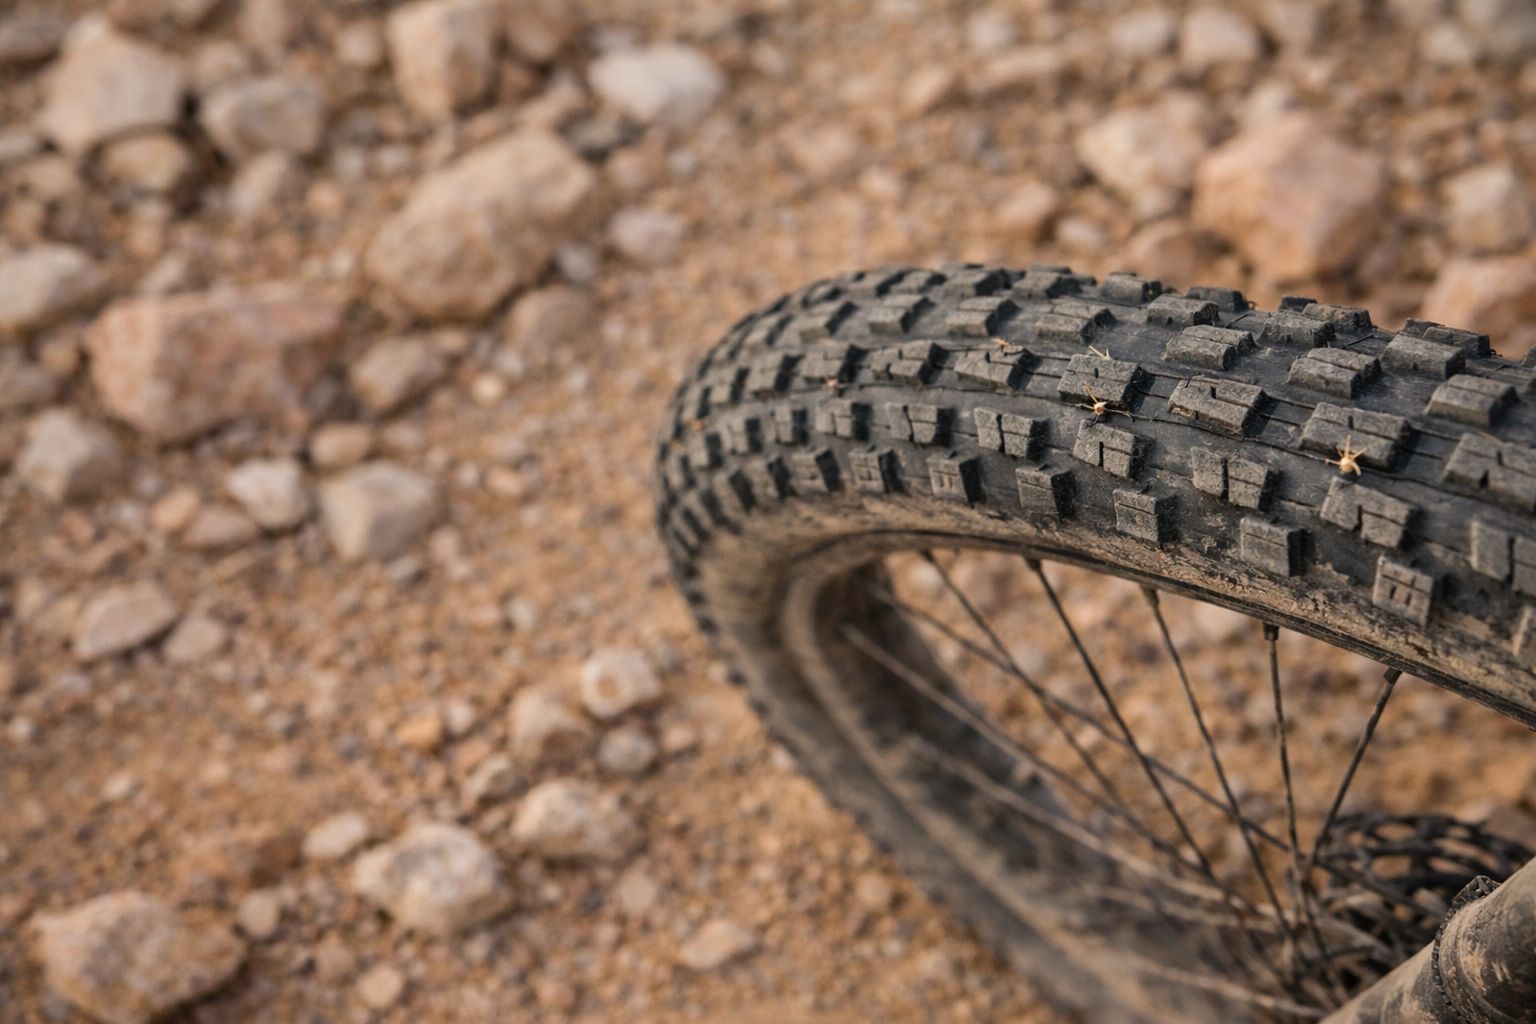
Cactus thorns embedded in the tread: a normal situation on the Baja Divide, where rapid management of micro-punctures matters more than preventing them entirely.
Why the Baja Divide is hard on tyres
The main causes of punctures are not random. They are systemic:
- extremely hard cactus thorns
- sharp volcanic rocks
- continuous washboard
- deep sand forcing lower pressures
- high temperatures degrading sealant
Tyres between 2.35” and 2.8” are common here. The goal is not speed optimisation, but reducing downtime and cumulative stress on tyres, rims and casings.
Why many finishers are moving away from true “plus” tyres
In the early years (2015–2019), Baja setups followed a simple idea: maximum volume.
Over long distances, however, several issues emerged:
- dynamic drift under load — 2.8–3.0 tyres float well but oscillate on washboard terrain
- fatigue steering — excessive volume creates constant micro-movement and arm fatigue
- bead reliability — more burping and sidewall damage after extended mileage
The modern balance increasingly favours structural stability over pure flotation.
The setup emerging among finishers
In recent years, Baja Divide finishers have converged toward a surprisingly consistent configuration — almost an unwritten standard.
- 29” wheels
- 2.35” – 2.6” tyres
- 30–35 mm internal rims
- reinforced fast-rolling XC tread
- durable trail/XC casing
After roughly 1,000 km, performance is no longer about grip or comfort but casing stability over time.
Rigid steel platforms designed for extended off-road travel — such as the Ritchey Ultra — align particularly well with this reliability-first philosophy.
Tubeless: essential, but configured differently
Tubeless systems are essential, but configured differently from normal riding.
- reinforced tyre casings
- 120–150 ml sealant per wheel
- top-ups every 7–10 days
- moderate pressures rather than extremely low ones
A common mistake is lowering pressure excessively for sand, increasing rim strikes and sidewall damage.
The real key tool: plugs
- sealant fixes most thorn punctures
- plugs solve nearly everything else
- carry many plugs, not just a few
- repair without removing the wheel
- inflate and keep riding immediately
Many riders perform dozens of quick repairs during the route.
Front insert: a recent trend
- rim protection on hidden rocks
- rideable even at very low pressure
- reduced burping risk
Light XC or bikepacking inserts are generally preferred over heavy downhill systems.
The emergency tube (when it really matters)
The inner tube is not the primary solution. Most finishers carry a single tube purely as an exit strategy after structural tyre damage.
- serious sidewall cut
- damaged bead
- complete tubeless failure
Cactus thorns easily penetrate tubes, so riders must carefully clean the tyre interior and use a tyre boot.
The real enemy: sidewall cuts
Most mechanical DNFs are caused by structural casing damage rather than simple punctures.
A slightly heavier tyre is often the safer long-distance choice.
The unwritten rule of the Baja Divide
You do not optimise for speed. You optimise for continuity of movement.
An extra 300 g of tyre weight is preferable to losing half a day in the desert.
In summary: the Baja Divide formula setup
- 29” wheels
- 30–35 mm internal rims
- 2.4–2.5 reinforced tyres
- 130 ml tubeless sealant
- front insert + tube backup
Repair kit checklist for the Baja Divide
- large quantity of tubeless plugs
- reliable high-volume mini pump
- CO₂ cartridges as backup
- spare sealant
- replacement tubeless valves
- strong tyre levers
- tyre boot
- emergency inner tube
- patch kit
- multi-tool with chain breaker
- cloth or gloves for tyre inspection
On the Baja Divide the objective is not avoiding problems entirely, but minimising the time required to move again. A simple, redundant and easily accessible repair kit often makes the difference between a short stop and hours lost in the desert.
Tyre setup is only part of the equation: on the Baja Divide, it is the entire bike–load–reliability system that determines whether the journey remains sustainable over time.
FAQ – Baja Divide tyre setup and puncture management
What is the most common pressure mistake?
Running pressures too low for sand increases rim impacts, burping and casing damage over long distances.
Is tubeless absolutely necessary?
Yes. Tubeless systems drastically reduce downtime from cactus thorn punctures when properly maintained.
Do tyre plugs really work?
In most situations yes. Combined with sealant, plugs allow riders to repair punctures within minutes.
Should you carry an inner tube?
Yes, but only as emergency backup after structural tyre damage.
Why are many riders choosing 2.4–2.6 tyres instead of full plus?
Because long-term casing stability and reliability matter more than maximum flotation once fatigue accumulates.
What causes most mechanical DNFs?
Sidewall cuts and accumulated structural stress rather than simple punctures.